-22.png)
How to Restore Headlights
If your headlights aren’t as clear and bright as they used to be, you’re not alone. Headlights naturally lose their clarity over time due to exposure to sunlight, dirt, and weather. Restoring them not only improves the look of your car but also makes night driving much safer. Whether you’re tackling the job yourself or considering a car detailing service at home, knowing the proper steps can make a big difference. Let’s break down how to restore your headlights and get them looking crystal clear again.
Assessing Headlight Condition
Before jumping into the actual work, take a few minutes to really examine your headlights. Check for yellowing, cloudiness, or hazing across the lenses — these are common signs of oxidation. Look closely for any cracks, deep scratches, or chips that might complicate the process. It’s also wise to turn your headlights on to see how well they project light.
If the beam looks scattered or dim, that’s another clue your lenses need some serious attention. Checking the inside of the housing for moisture or condensation is also worth doing, since trapped water can contribute to foggy lenses. Understanding precisely what you’re dealing with helps you target the right solution.
Gathering Necessary Supplies
Restoring headlights is easier when you have the right tools ready to go. Most auto parts stores carry complete headlight restoration kits, typically including sandpaper in different grits, a polishing compound, and a protective sealant. You’ll also want some masking tape to protect your paint, a microfiber cloth for cleaning and polishing, and a spray bottle with water for wet sanding.
A pair of gloves will keep your hands clean, and if you have a heat gun or even an essential hair dryer, it can help speed up drying time. Having all these items nearby will make the process smoother and help you get the best possible result.
Preparing Headlight Surface
Start by giving your headlights a good wash. Use a mild car soap mixed with water to scrub away any dirt, bug residue, or road grime stuck to the surface. A clean microfiber cloth works best for this step — make sure you’re cleaning in circular motions to lift off stubborn debris.
After rinsing thoroughly with clean water, dry everything with a fresh microfiber towel. This prep step is easy to overlook, but it’s critical. Any leftover dirt or grease will interfere with sanding, polishing, and sealing, so you want to start with a spotless surface.
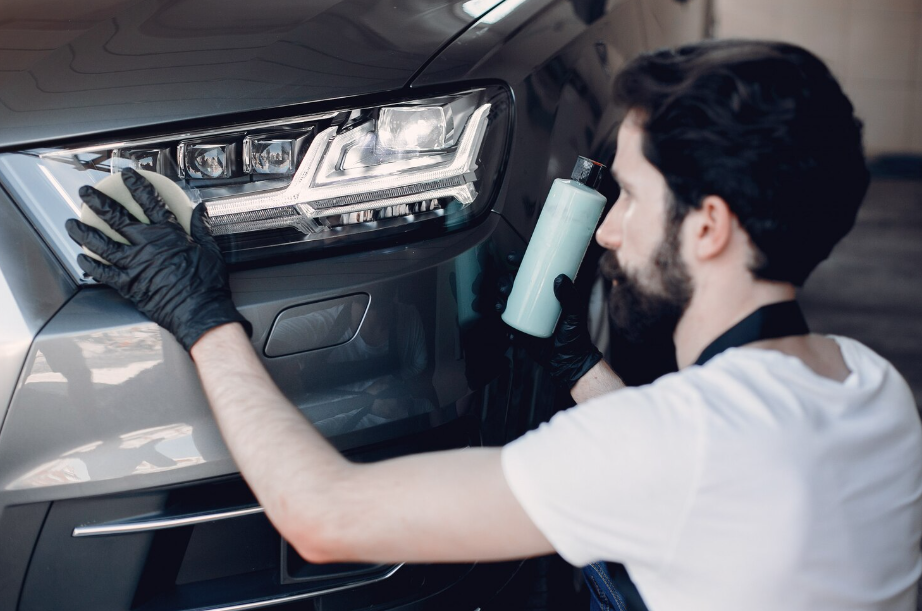
Applying Restoration Solution
Once the surface is clean, it’s time to apply the restoration solution. Shake the bottle well so everything inside is adequately mixed, then apply a small amount onto a clean, lint-free cloth or applicator pad. Spread the solution evenly across the entire headlight using back-and-forth strokes, paying extra attention to areas with heavy cloudiness.
Be careful not to let the solution drip onto your paint or trim. After covering the surface, let the product sit for the time recommended on the label — this allows the active ingredients to break down oxidation and restore clarity. Don’t let it fully dry unless the product specifically says to. After the recommended time has passed, you’re ready for the finishing touches.
Finishing Touches and Maintenance
After the restoration solution has done its job, grab a clean microfiber cloth and gently buff the headlights to remove any leftover product and bring out the shine. This step gives the lenses a smooth, polished look. To help the results last longer, apply a UV protectant sealant over the surface. This creates a protective barrier against sunlight, which is a significant cause of future yellowing and hazing.
With the sealant applied, your headlights will stay clearer for much longer. Inspecting your headlights regularly and cleaning them during routine car washes is also a good habit. If you see any signs of hazing returning, addressing it early will help prevent a complete restoration from being necessary again.
Clear, bright headlights make a huge difference in how your car looks and how safe your nighttime drives feel. If you’d rather skip the hassle, an auto detailing service at home can handle the entire process for you — saving you time and guaranteeing professional results. Either way, staying on top of headlight maintenance keeps your car looking sharp and your driving visibility at its best.
Want your car to shine from headlights to bumper? Schedule a professional auto detailing service at home and bring back that showroom look without leaving your driveway.
Other Related Topics: